Minimum IAM Permission to create S3 presigned URLs

If you wanted to publicly share a file or an object inside a private S3 bucket you will need to create an S3 presigned URL. This will create a temporary link to the S3 file which you can share and access publicly.

As best practice, we must apply the least privileged permission to the IAM user or IAM role that will create the S3 presigned URL. Which brings us to the question, what is the minimum IAM permission to create an S3 presigned URL?

Continue reading Minimum IAM Permission to create S3 presigned URLs

How to download all files in an S3 Bucket using AWS CLI

There are many ways to download files from an S3 Bucket, but if you are downloading an entire S3 Bucket then I would recommend using AWS CLI and running the command aws s3 sync s3://SOURCE_BUCKET LOCAL_DESTINATION.

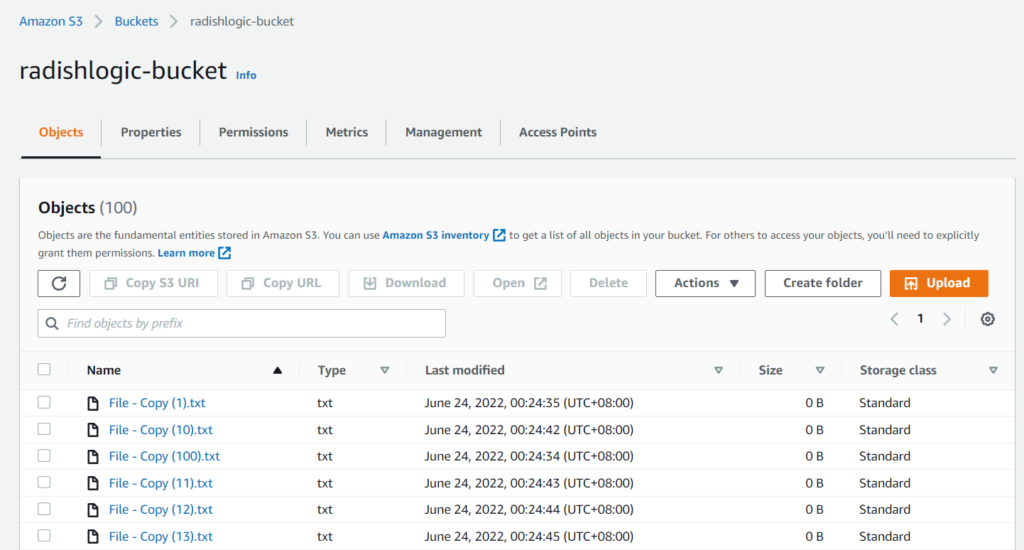
In the examples below, I’m going to download the contents of my S3 Bucket named radishlogic-bucket.

My S3 Bucket in the AWS Console
My S3 Bucket in the AWS management console


Example 1: Download S3 Bucket to Current Local Folder

If you want to download the whole S3 Bucket in the same folder that you are in, then you should use the command aws s3 sync s3://SOURCE_BUCKET ..

In our example S3 Bucket above, the AWS CLI will be like this.

Continue reading How to download all files in an S3 Bucket using AWS CLI

How to create IAM User Access Keys via AWS CLI

To create programmatic Access Keys for an AWS IAM User using AWS CLI, run the command aws iam create-access-key.

On the command below change MyUser with the username of your target IAM User.

aws iam create-access-key --user-name MyUser

This will return the following JSON formatted string.

Continue reading How to create IAM User Access Keys via AWS CLI

How to create IAM User Access Keys using AWS Console

If you want to be able to control your AWS resources on your local computer you will either use AWS CLI or AWS SDK. To use those tools, you will need to have an Access Key ID and a Secret Access Key.

In this post, we will show you how you can generate your own Access Keys so you can programmatically access your AWS resources.

For the instructions later the target username that I want to create Access Keys is rabano. Yours will be different.

Continue reading How to create IAM User Access Keys using AWS Console

List of Public SSM Parameters of latest Operating System EC2 Images

We are running CI/CD pipelines that take the latest EC2 Image of Windows or Red Hat then it will automatically install the required security agents and check if they are properly installed.

At first, it was a hassle since we had to always be on the lookout for the latest EC2 Image ID of our target operating system and input this manually into our pipeline. But as it turns out AWS maintains SSM Parameters that holds the latest Image IDs of various operating systems and their versions.

Sometimes I see these in CloudFormation scripts.

Continue reading List of Public SSM Parameters of latest Operating System EC2 Images

How to access the C: Drive in Amazon Workspaces

The C: Drive or root volume in AWS Workspaces cannot be seen if you open File Explorer.

This post will show how you can access the C: Drive when it is not shown.

If you want the C: Drive to be shown permanently then reading my post about it here will help.

Below are three ways you can access the C: Drive.


Access C: Drive with Windows File Explorer

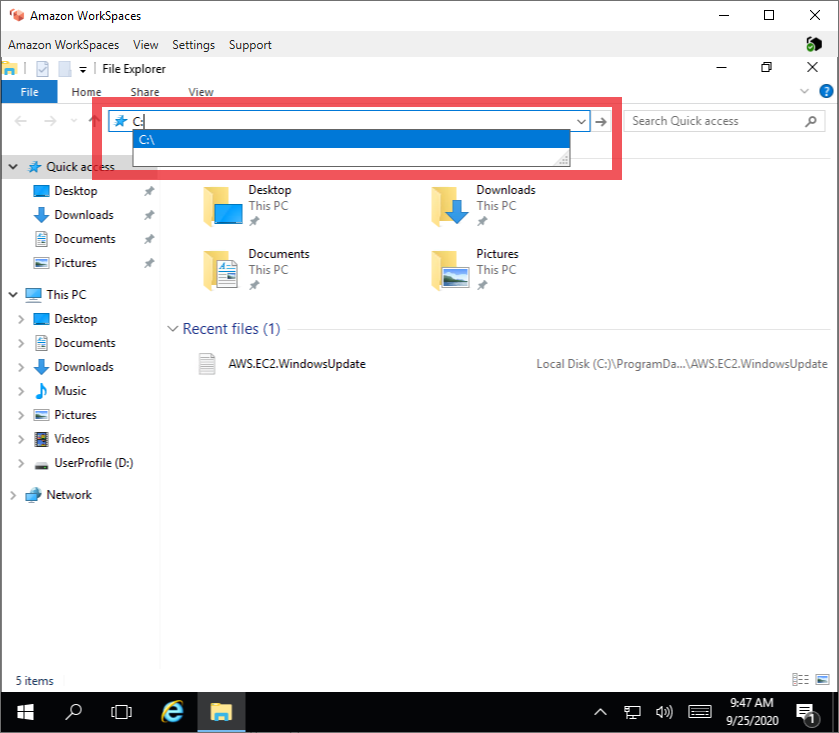
To access C: Drive with Windows File Explorer, go to the address bar and enter C:. This will bring you to the C: Drive.

Continue reading How to access the C: Drive in Amazon Workspaces

How to show C: Drive in Amazon Workspaces

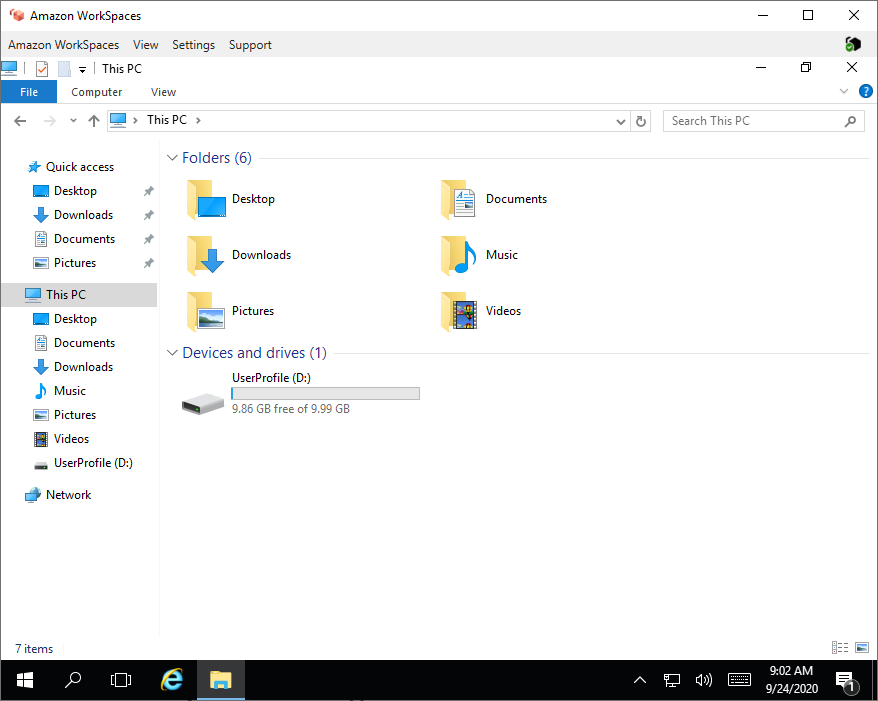
If you have been using AWS Workspaces then you might have noticed that the C: Drive cannot be seen when you open Windows File Explorer.

File Explorer not showing C: Drive in an Amazon Workspace

The reason why the C: Drive is hidden in Workspaces is because it is the root volume. Users are discouraged from storing files in the root volume because when you need to Rebuild a workspace any changes that you made in the C: Drive will be wiped out. Only the D: Drive or the User Volume will be restored to what its previous snapshot.

There are some use cases when you need to access the C: Drive. It might also be possible that you just want to have the C: Drive visible.

Follow the steps below to make the C: Drive visible in Windows File Explorer in your Amazon Workspaces.


Steps in showing the C: Drive in Amazon Workspaces

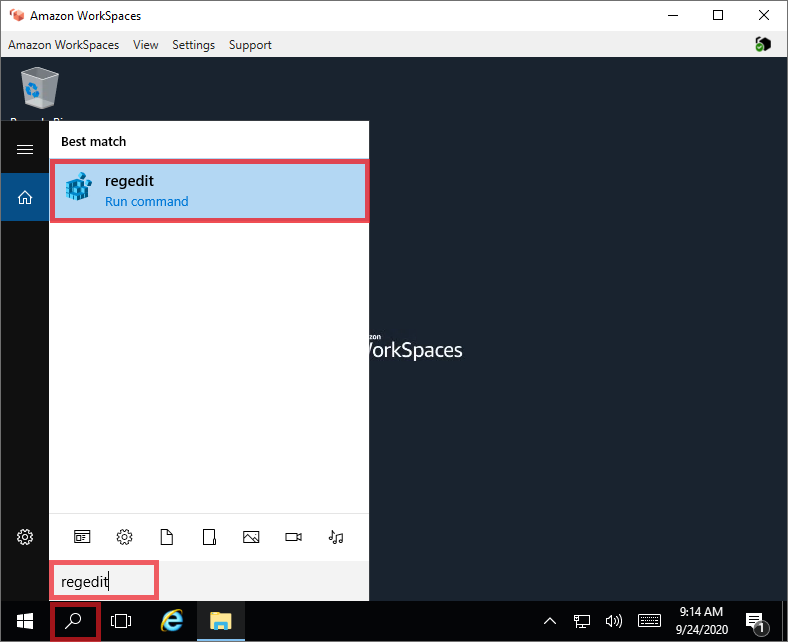
Click on Search icon and type regedit. Then click on regedit.

Continue reading How to show C: Drive in Amazon Workspaces

CloudFormation: How to solve Circular Dependency between an Elastic IP and an EC2 Instance

When writing a CloudFormation Template that needs to use the value of an Elastic IP to a file inside an EC2 Instance, you will most likely encounter a Circular dependency between resources error.

I encountered this when configuring OpenSwan IPSec VPN in CloudFormation.

You can try the CloudFormation template below to see the error above.

CloudFormation Template with Circular Dependency Error

Parameters:
  AmazonLinux2AMIID:
    Type: AWS::SSM::Parameter::Value<AWS::EC2::Image::Id>
    Default: /aws/service/ami-amazon-linux-latest/amzn2-ami-hvm-x86_64-gp2

  KeyName:
    Type: AWS::EC2::KeyPair::KeyName

Resources:
  ElasticIP:
    Type: 'AWS::EC2::EIP'
    Properties:
      Domain: vpc
      InstanceId: !Ref EC2Instance
  
  EC2Instance:
    Type: AWS::EC2::Instance
    Properties: 
      ImageId: !Ref AmazonLinux2AMIID
      InstanceType: t2.micro
      KeyName: !Ref KeyName
      UserData: 
        Fn::Base64:
          !Sub |
            #!/bin/bash -ex
            echo "${ElasticIP}" >> /EIPAddress.txt
Continue reading CloudFormation: How to solve Circular Dependency between an Elastic IP and an EC2 Instance

How to install ChefDK in Amazon Linux 2
The ChefDK is a package that includes everything you need to start using Chef. You will need this if you want to develop using chef.

Since I always use Amazon Web Services (AWS) EC2, I tend to choose Amazon Linux 2 even for projects using Chef.

Below is a step-by-step tutorial on how to install ChefDK in an EC2 instance running Amazon Linux 2.


Installation via shell commands

SSH to your Amazon Linux 2 EC2 Instance and run the command below.

curl https://omnitruck.chef.io/install.sh | sudo bash -s -- -c current -P chefdk

This will install the latest version of ChefDK.

For production systems we should specify the specific version of ChefDK or else this will install the version. To do this we need to add the -v option in the end of the command.

Below is an example where we install ChefDK version 4.7.73.

curl https://omnitruck.chef.io/install.sh | sudo bash -s -- -c current -P chefdk -v 4.7.73

Next is to check if chef was installed properly. Go to the Verification section of this post.


Installation via ChefDK Download Page

Go to https://downloads.chef.io/chefdk.

You may select your desired version for ChefDK. Default is the latest stable version.


Copy the URL for the latest version of Red Hat Enterprise Linux.

Continue reading How to install ChefDK in Amazon Linux 2