When I create Windows Instances in AWS EC2, I usually forget to add a drive or two. With this step-by-step tutorial, I will walk you through how to create a new Volume for EC2 Instances, then make Windows use the new Volume without a reboot.
- Initial Setup
- Creating and Attaching the Volume in AWS EC2 Console
- Adding the new Volume to Windows System
Initial Setup
I launched a EC2 Windows 2016 Server with only 1 Block Device (/dev/sda1), which is also my Root Device.
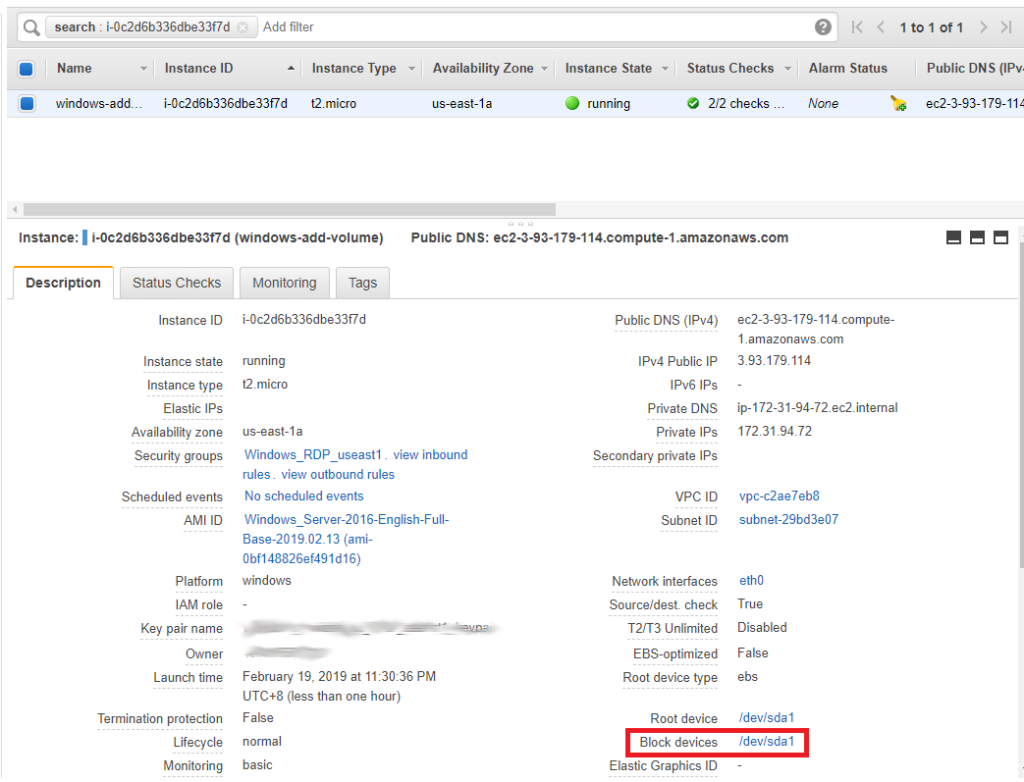
Note the Availability Zone where your instance is located, you will need this later. Mine is in us-east-1a.
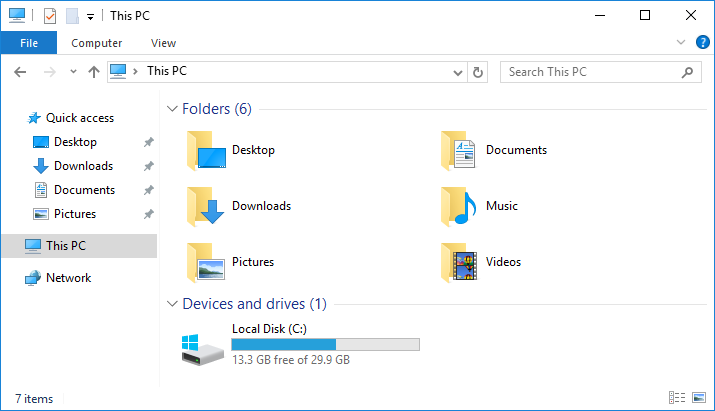
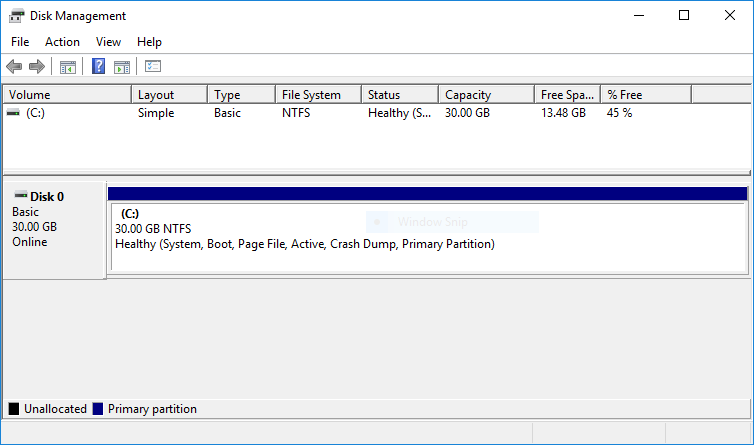
Looking inside Windows it only has 1 volume.
Creating and Attaching the Volume in AWS EC2 Console
Now we need to attach a new Volume for our Windows Server.
Go to AWS EC2 Console, on the left sidebar click on <strong>Volumes</strong>.
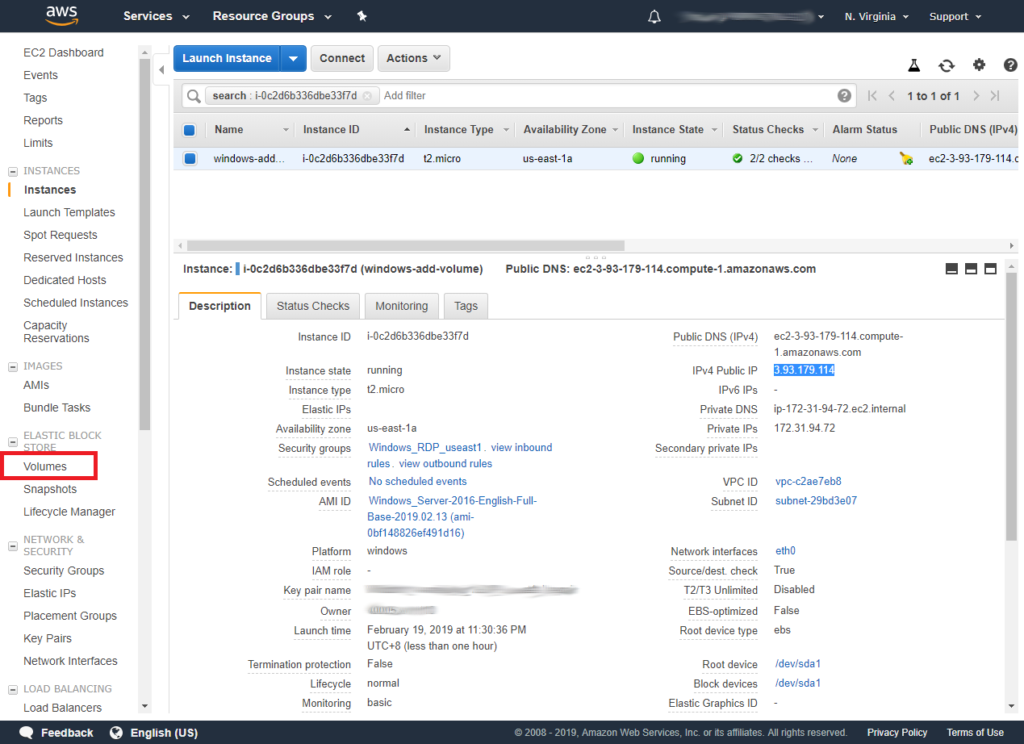
Click on Create Volume.

Apply your desired settings on the volume. Then click Create.
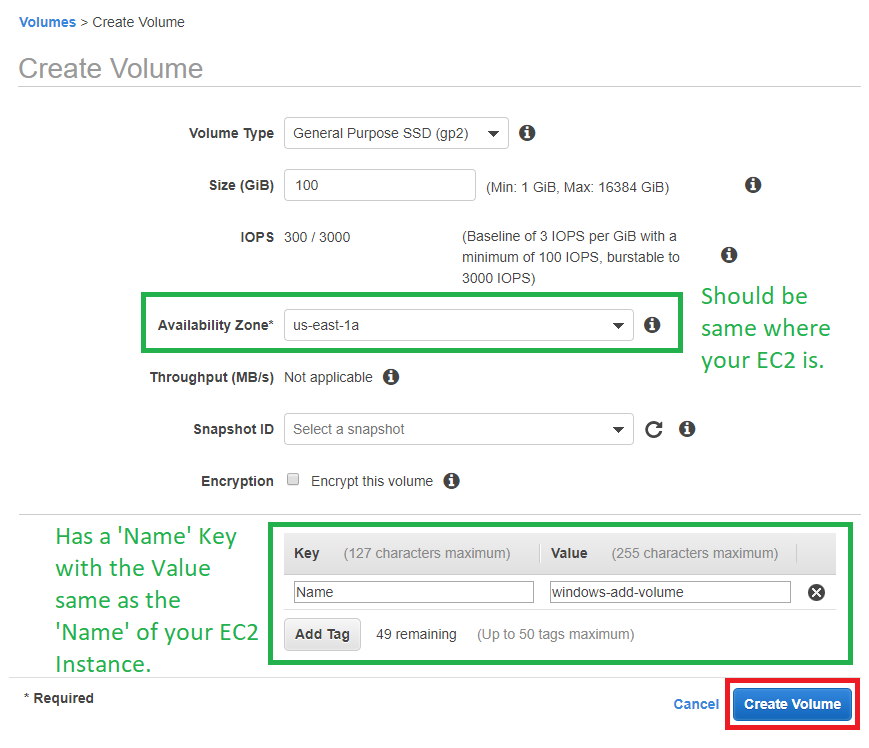
Note 1: You need to set the Availability Zone (AZ) to be the same as your EC2 Instance where you are attaching the Volume. If they are on different AZ you will not be able to attach the new Volume to your EC2 Instance.
Note 2: I prefer to put a Tag with Key ‘Name’ and the Value should be the same as my EC2 Instance Tag ‘Name’. The reason for this is that whenever I look at the EC2 Volumes page I know on which instance each volume is attached and their purpose.
The other settings would depend on your use case.
On most cases I use the General Purpose SSD (gp2) as my Volume Type.
Then it will say that you have successfully create a Volume and show the volume ID. Click on Close.

You will then go back to the Volumes list.
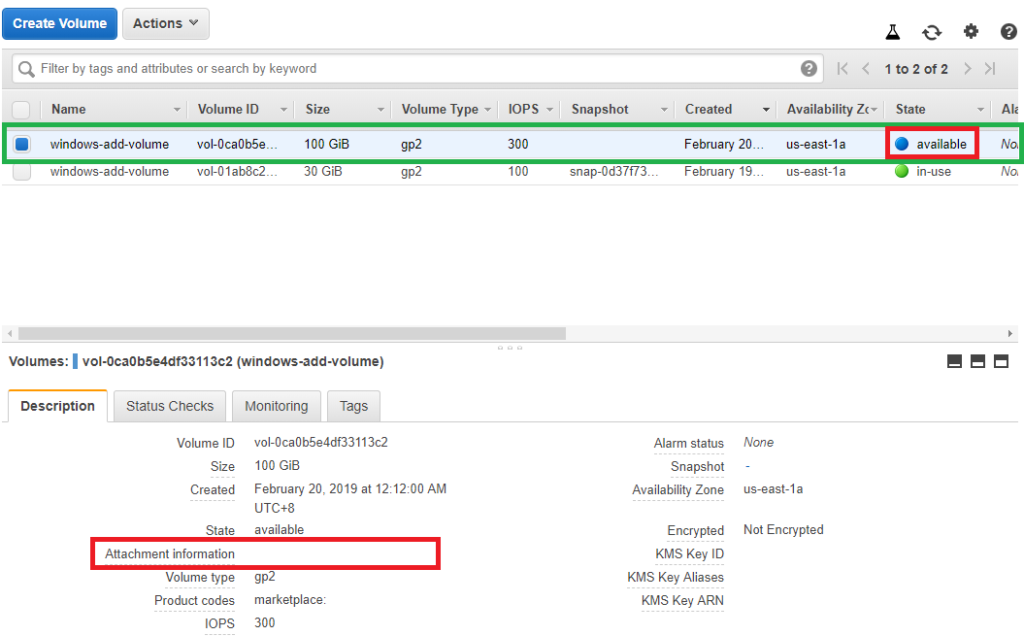
When you select your newly created Volume the State says that it is available. What this means is that it is not yet attached to an instance.
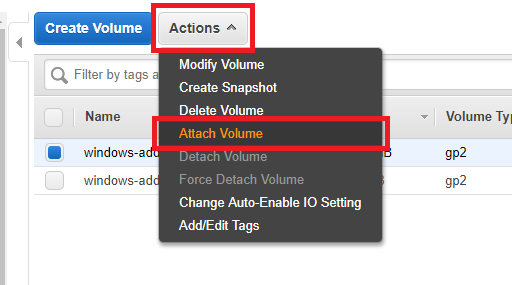
We cannot use a volume without attaching it to an instance. To do this click on Actions then Attach Volume.
On the Instance text box click on it and search for your instance. Once you click on your desired instance the Device text box will automatically be filled, I always leave this alone. Click on Attach.
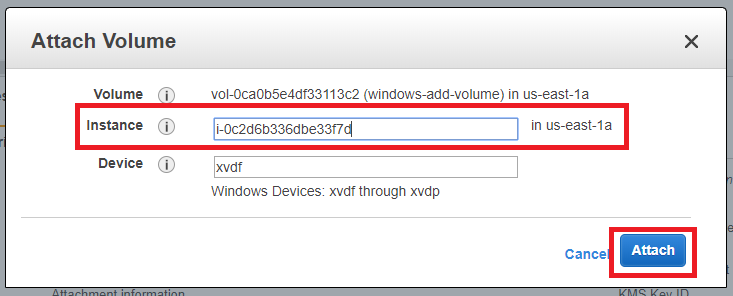
If you do not see your instance then you have create a Volume on a different Availability Zone.
You will go back to the Volumes page and now you can see the state of your Volume is attached.
It also shows you the Attachment Information so you could know where your Volume is attached.
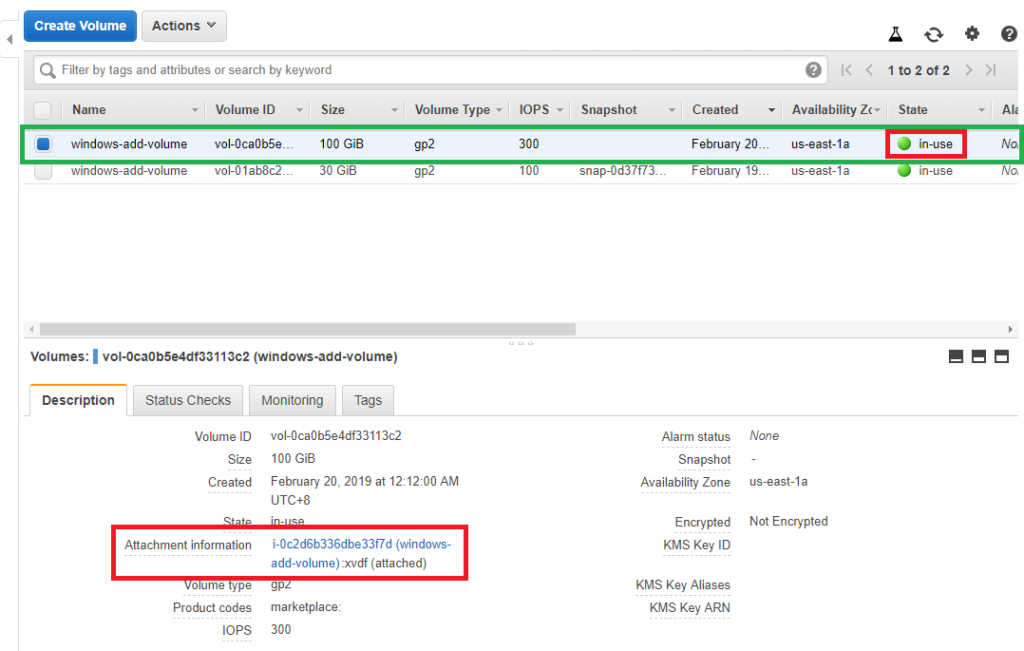
Now that we have created our Volume and attached it to our Windows EC2 Instance its time to setup our Windows Server for it to be able to use the new Volume.
Adding the new Volume to Windows System
Access your Windows EC2 Instance via RDP.
Then open Disk Management.

If ever you do not see the additional disk click on Action then Refresh.
Notice that the new Disk has a Offline Status.
Right Click on the new Disk and click Online.
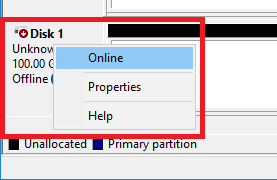
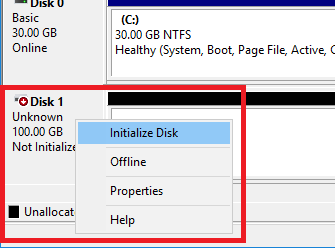
This will change the Status to Not Initialized.
Right Click on the Disk again and click Initialize Disk.
The Initialize Disk Window will appear. You can leave everything as default and click OK.
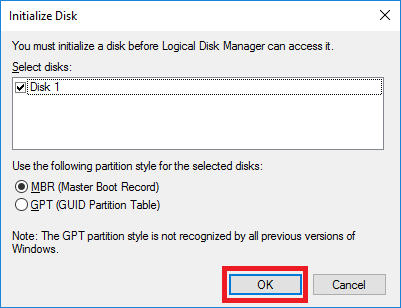
You can choose MBR or GPT as your partition style. Both will work. GPT is better but weirdly the C: Drive is in MBR so I usually choose MBR. You can read more about the difference of MBR and GPT here.
The status of your Disk will now be Online.
Right Click on the Disk again, this time on the white part where it is written Unallocated. Then click New Simple Volume.
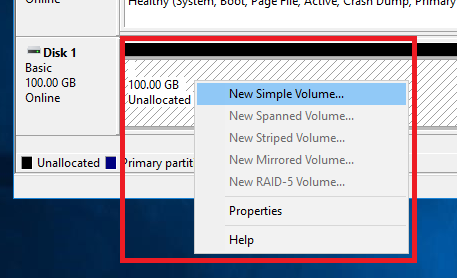
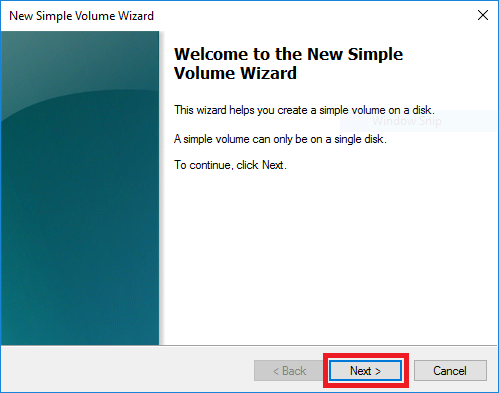
This will launch the New Simple Volume Wizard.
Click on Next.
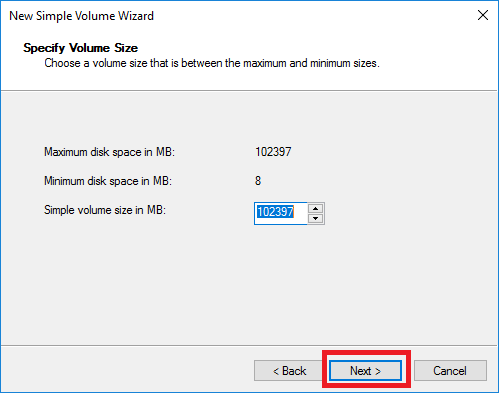
Specify the Volume Size that you want. For EC2 Instances, I would recommend using the whole drive. Click Next.
On the Assign Drive Letter or Path page, choose the drive letter that you want. You can leave this as default, then click on Next.

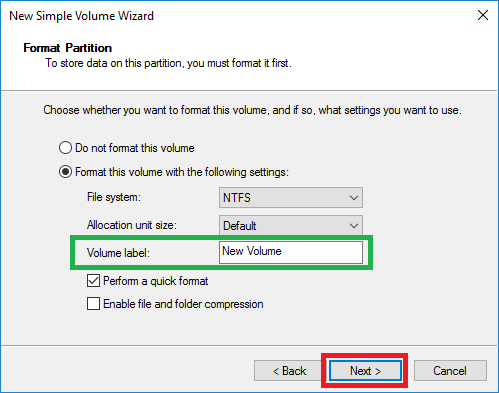
For Format Partition, change the Volume Label to your desired label. You can leave it as default if you want. Click Next.
On the review page, just click Finish.
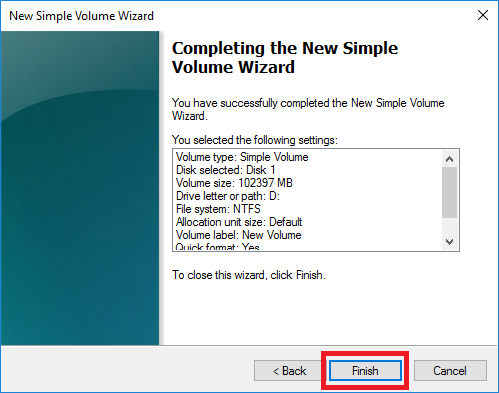
The Disk will show Formatting and after a short amount of time it will have a status of Healthy (Partition Primary).
An additional Drive would be listed on the Volume List above.

If you check File Explorer you will now have an additional drive.
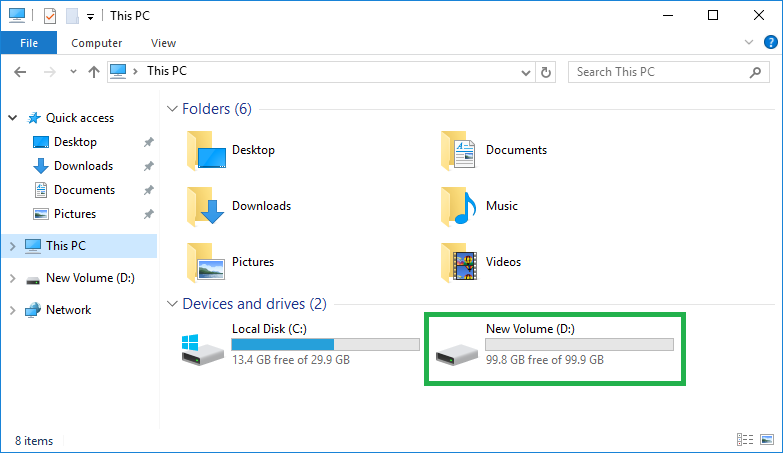
You can now use the new drive for your Windows Server.
I hope this post helped you on getting familiar with attaching a new volume on a Windows EC2 Instance.