We will setup the ESP8266 to connect to your WiFi Network and then communicate with your computer over WiFi.
The goal is to setup the ESP8266 as a Web Server and for it to generate a random number that it will send via WiFi to a web browser.
Hardware
You will only need the following for this tutorial.
- Adafruit Feather Huzzah with ESP8266
- microUSB cable
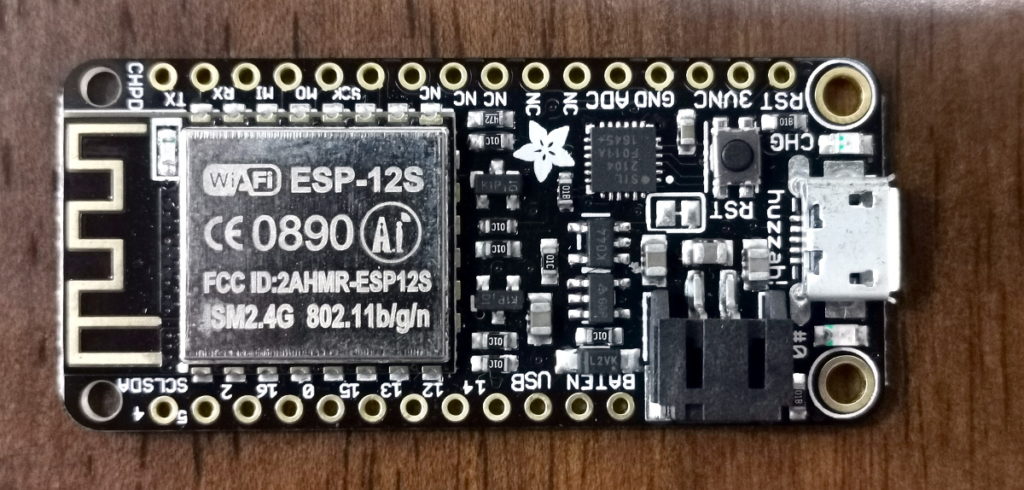
You do not need to solder the pins of the Adafruit Feather HUZZAH ESP8266 since we will not wire anything to it.
Use of other ESP8266 modules can be done such as.
- Adafruit HUZZAH ESP8266 Breakout (Needs additional wiring and components)
- NodeMcu Lua WIFI Board Based on ESP8266 CP2102 Module
- ESP8266 SMT Module – ESP-12S (Needs additional wiring and components)
What is a Web Server?
Web Server – a program that runs that waits for a client request. Once a client request is received it serves (responds) the data to the client.
Client – a program that would communicate with the Web Server and request for data.
In this case the ESP8266 will be configured as a Web Server and the Web Browser will be the client.
Arduino Code for ESP8266
The code below is a simplified version of the WiFiWebServer code that can be found on the Examples when you install the Adafruit ESP8266 board.
If you want to see the full code you can do so by clicking File >> Examples >> ESP8266WiFi >> WiFiWebServer.
I modified the WiFiWebServer code so that we can quickly test the ESP8266 without wiring other components.
#include <ESP8266WiFi.h>

const char* ssid = "your-ssid";
const char* password = "your-password";

WiFiServer server(80);

void setup() {
  Serial.begin(115200);
  delay(10);

  // Connect to WiFi network
  Serial.print("Connecting to ");
  Serial.println(ssid);

  WiFi.mode(WIFI_STA);
  WiFi.begin(ssid, password);

  while (WiFi.status() != WL_CONNECTED) {
    delay(500);
    Serial.print(".");
  }
  Serial.println("");
  Serial.println("WiFi connected");

  // Start the server
  server.begin();
  Serial.println("Server started");

  // Print the IP address
  Serial.println(WiFi.localIP());
}

void loop() {
  // Check if a client has connected
  WiFiClient client = server.available();

  if (client) {
    // Wait until the client sends some data
    Serial.println("-----------------------");
    Serial.println("new client");
    while (!client.available()) {
      delay(1);
    }

    // Read the first line of the request
    String clientRequest = client.readStringUntil('\r');
    Serial.println(clientRequest);

    client.flush();

    long randNumber = random(1000);
    Serial.print("randNumber: ");
    Serial.println(randNumber);

    // Prepare the response
    String esp8266Response =
        "HTTP/1.1 200 OK\r\n"
        "Content-Type: text/html\r\n\r\n" +
        String(randNumber);

    // Send the response to the client
    client.print(esp8266Response);
    delay(1);
    Serial.println("Client disonnected");

    // The client will actually be disconnected
    // when the function returns and 'client' object is detroyed
  }
}
Edit the your-ssid and your-password to your WiFi Network SSID and password.
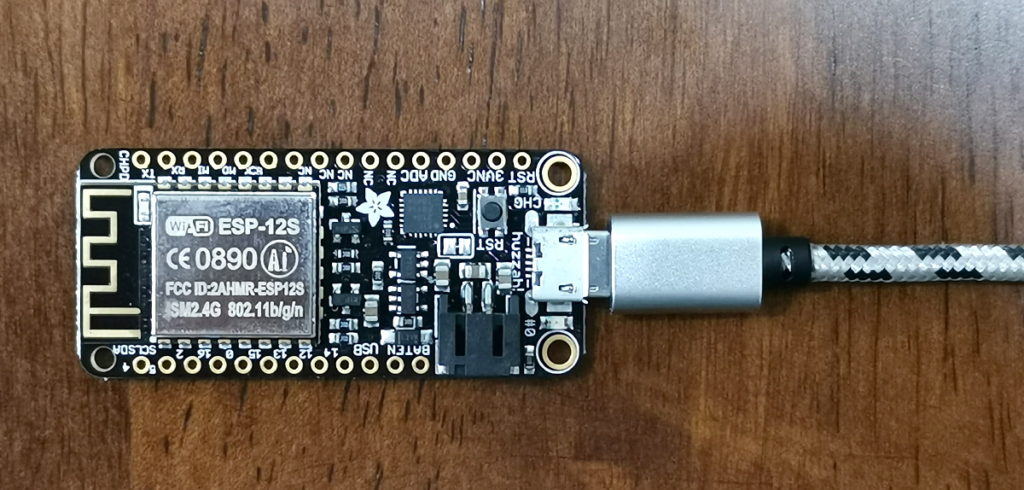
Connect the ESP8266 module to your computer.
Upload the Arduino code above to the ESP8266 module and check the Serial Monitor.
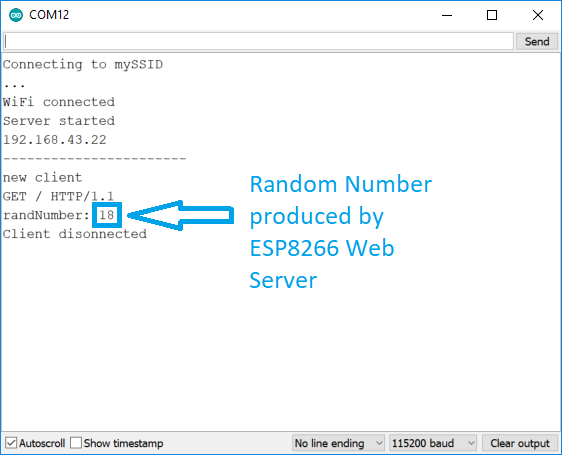
You will see ESP8266 will connect to your WiFi and show the IP Address it was given.
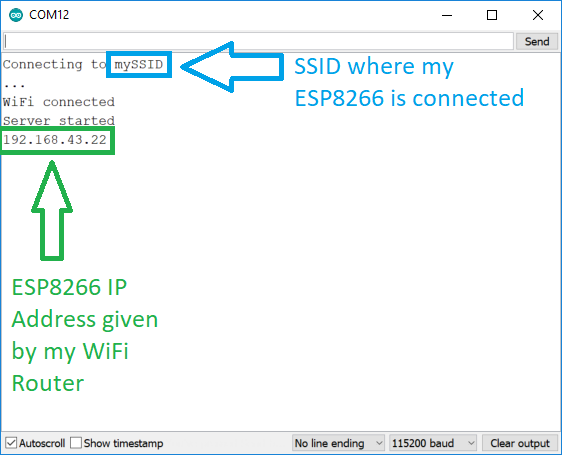
Arduino Serial Monitor
Note the IP Address as you will need this on the steps below.
Make sure also that your computer is connected to the same network as your ESP8266.
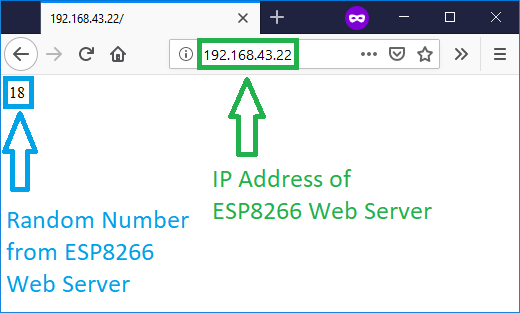
Let’s visit ESP8266 Web Server via Web Browser
Open a Web Browser (Firefox, Chrome, Microsoft Edge, etc) and in the URL address bar place the IP Address of your ESP8266. Press Enter.
Arduino Serial Monitor
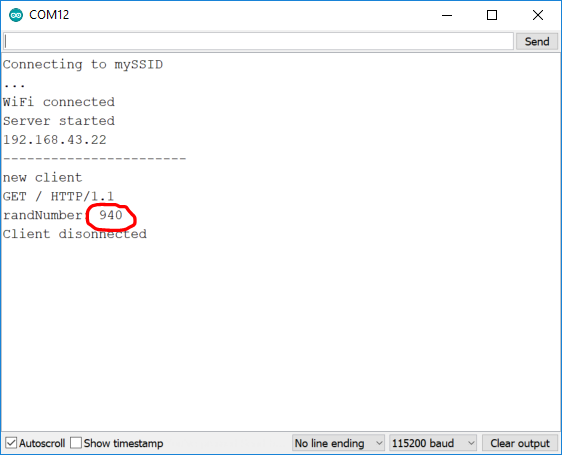
The Random Number that the ESP8266 will display on the Arduino Serial Monitor will be the same as the one that will be displayed on the Web Browser. This proves that we are communicating with our ESP8266 module using the WiFi Network.
Note: When I used Chrome as my web browser it would send 2 requests to my ESP8266 Web Browser. The first is the normal request which will display the random number. The second is trying to get /favicon.ico. Since there are 2 requests it will generate two random numbers on our ESP8266 Arduino Serial Monitor I only saw one on my Web Browser.
Let’s add HTML!
If you want to add HTML syntax to the response of the ESP8266 module it is also possible.
Edit the esp8266Response with the code below.
String esp8266Response =
        "HTTP/1.1 200 OK\r\n"
        "Content-Type: text/html\r\n\r\n"
        "<!DOCTYPE HTML>"
        "<html><body><h1>Random Number from ESP8266: </h1>" +
        String(randNumber); +
        "</body></html>";
When you visit the IP address of the ESP8266 module on your Web Browser you will get the following result.
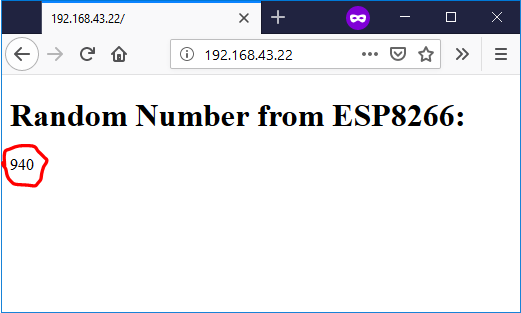
The Arduino Serial Monitor display is still the same but the Web Browser now has additional text as Header 1.
Conclusion
With this we can now see the ESP8266 working as a Web Server without the complicated wiring.
Now you can add some wires for your ESP8266 to communicate with an Arduino Uno or other modules you would like to use.