If you plan to make the communication of your site visitors to be secure by using HTTPS then you need to use Public SSL/TLS Certificate. You can do this by requesting for a Public Certificate via AWS Certificate Manager (ACM).
Below are the advantages of using Public SSL/TLS Certificate provided by AWS Certificate Manager.
- No charges = Free.
- Auto renew – No need to worry on expiring SSL/TLS Certificate. ACM Automatically does this for you.
- Easy integration with Amazon Web Services (AWS) products such as CloudFront, Elastic Load Balancer, API Gateway and many more.
Check the step-by-step guide on how you can request a Public SSL/TLS Certificate for HTTPS access of your website/domain.
Requesting for a Public SSL/TLS Certificate
Login to AWS Console and head to AWS Certificate Manager.
Note: AWS Certificate Manager is a regional service, therefore make sure to be in the correct AWS Region. If you are new to AWS just select N. Virginia (us-east-1) as it is one of the cheapest regions.
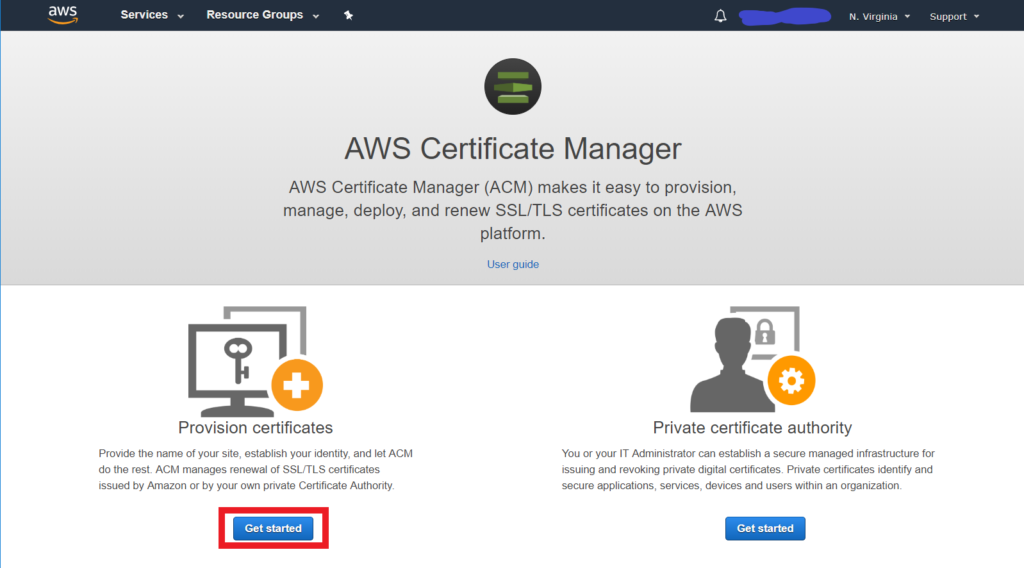
On the AWS Certificate Manager page, click on <strong>Get started</strong>.
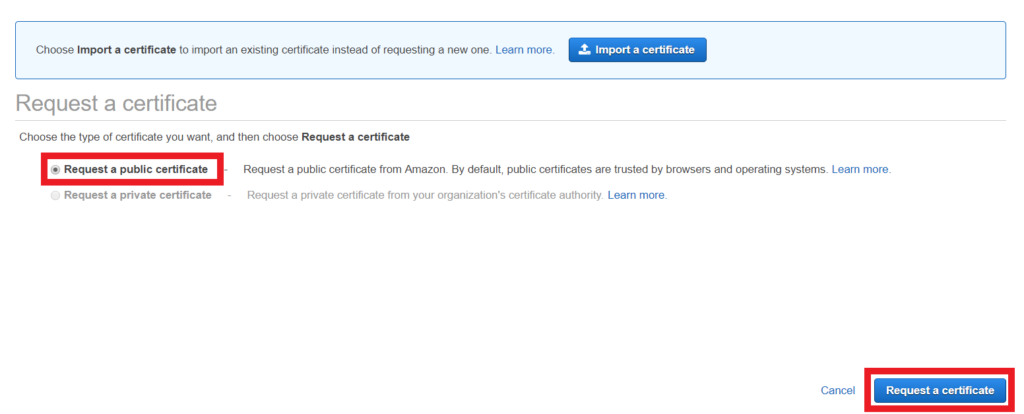
On the next screen, make sure to select the Request a public certificate, then click on Request a certificate.
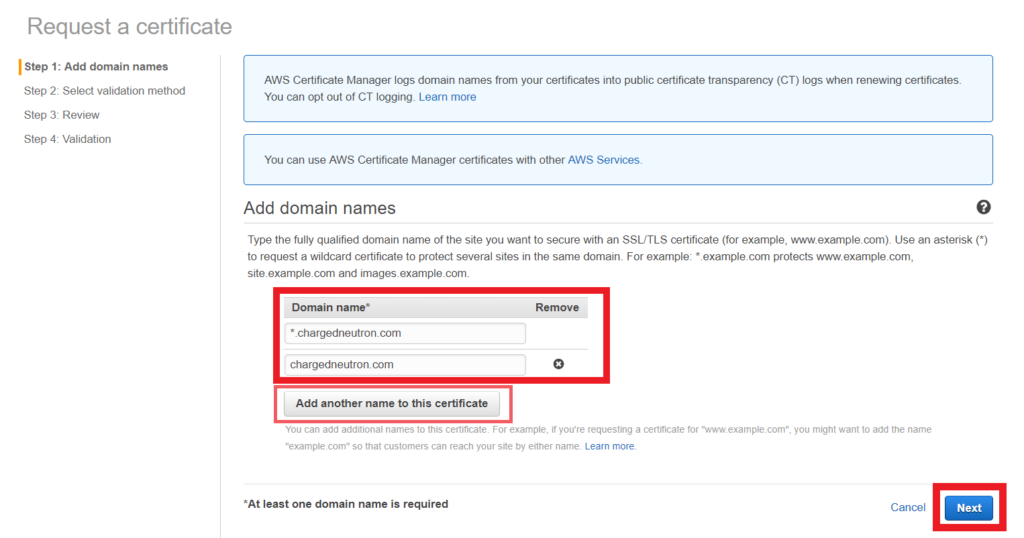
Under Add domain names. Enter the following.
| *.[Your Domain] Example: *.chargedneutron.com | The * represents a wildcard. This will allow you to use the SSL Certificate to any subdomains that you want like www.domain.com, images.domain.com, sites.domain.com, mobile.domain.com |
| [Your Domain] Example: chargedneutron.com | Apex Domain or Naked Domain Name. Your domain name without subdomains. Use this if you do not want to use www in front of your website. |
Then click on Next.
Select DNS Validation, then click on <strong>Review</strong>.
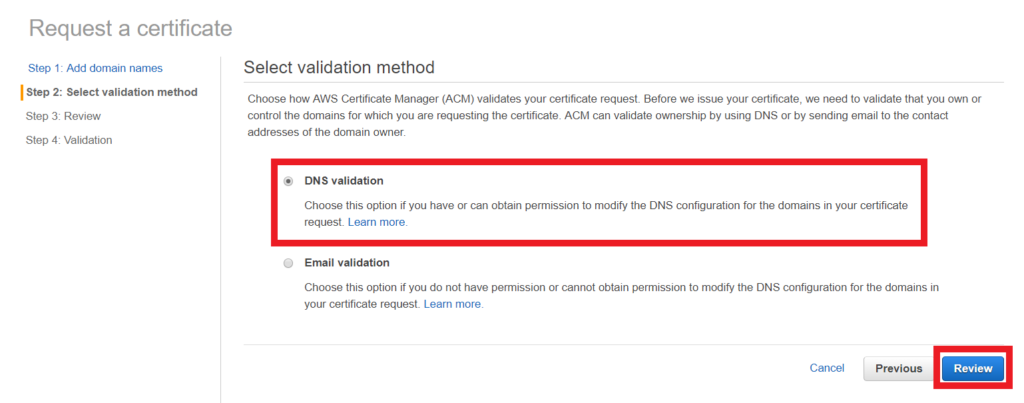
Note: You may also choose Email validation, especially when you own the domain name. I usually choose DNS validation since most of the time I do not own the domain name of clients and it is easier to validate.
Check if all the details are correct, then click Confirm and request.
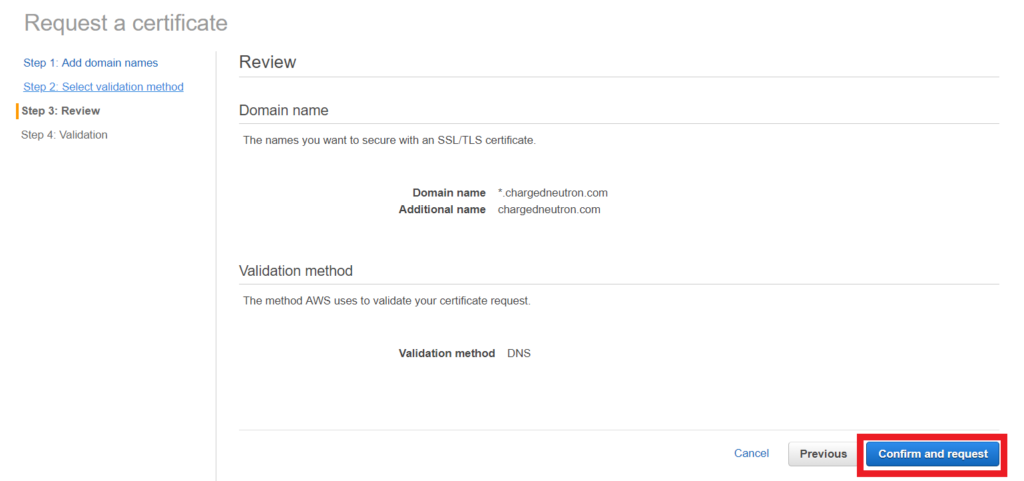
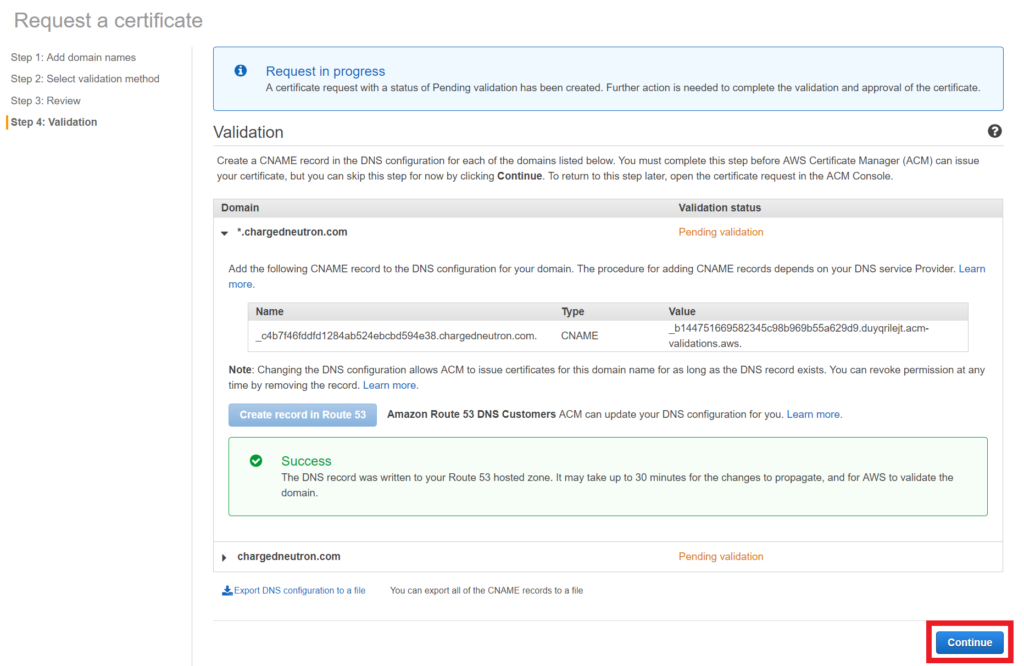
On the next screen you will see that your request has been submitted. You will need to validate that you have control over the domain.
Click on the arrow on the left side of your domain to get more details on how to validate.
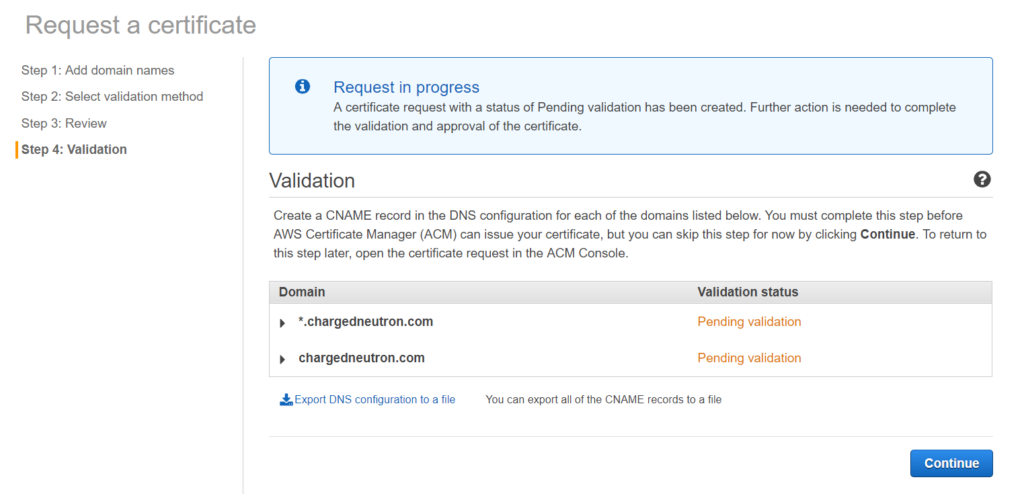
Note the values provided.
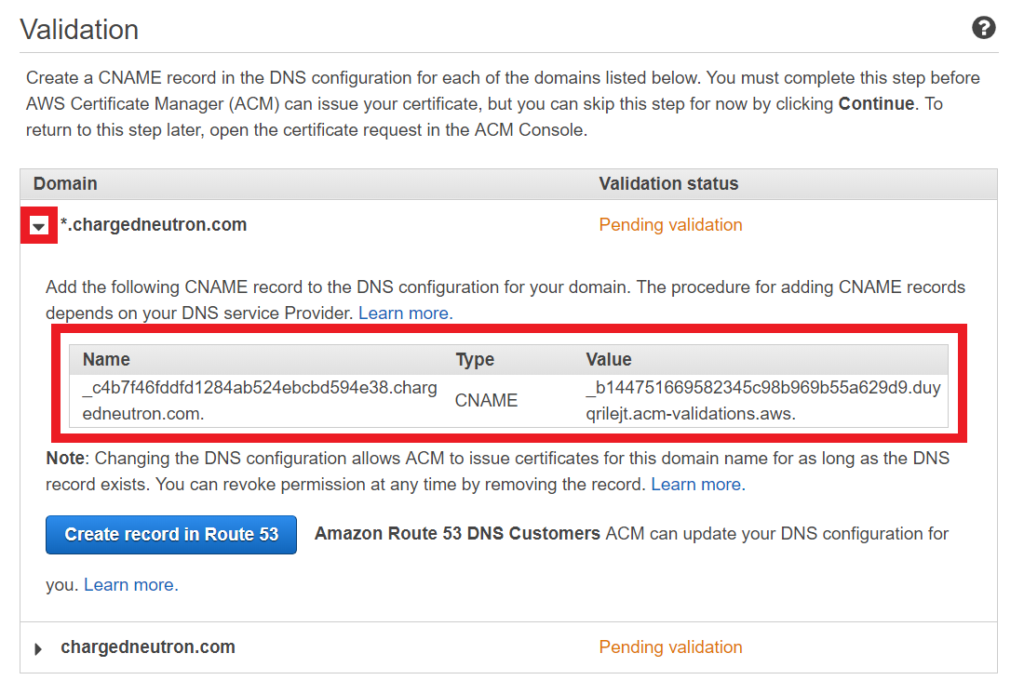
To simplify the process, click on <strong>Create record in Route 53</strong>. A screen will pop up confirming that you want to add a new Record in Route 53.
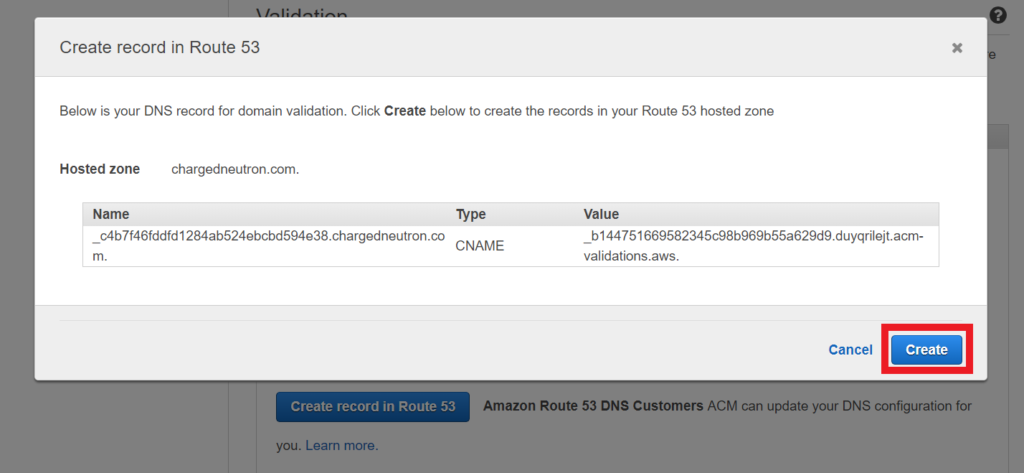
It will then show that the validation DNS Record was succesfully written to your Domain’s Route 53 Hosted Zone.

This is what it will look like in Route 53 Hosted Zone.
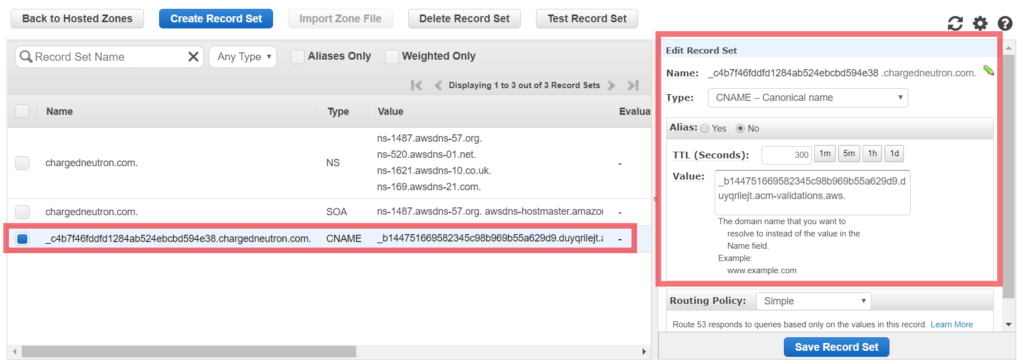
Important: Do not remove the Route 53 DNS Record that was added. Once you remove the record this will revoke the permission to use the SSL Certificate from your Domain.
Going back to the AWS Certificate Manager Console, click on Continue.
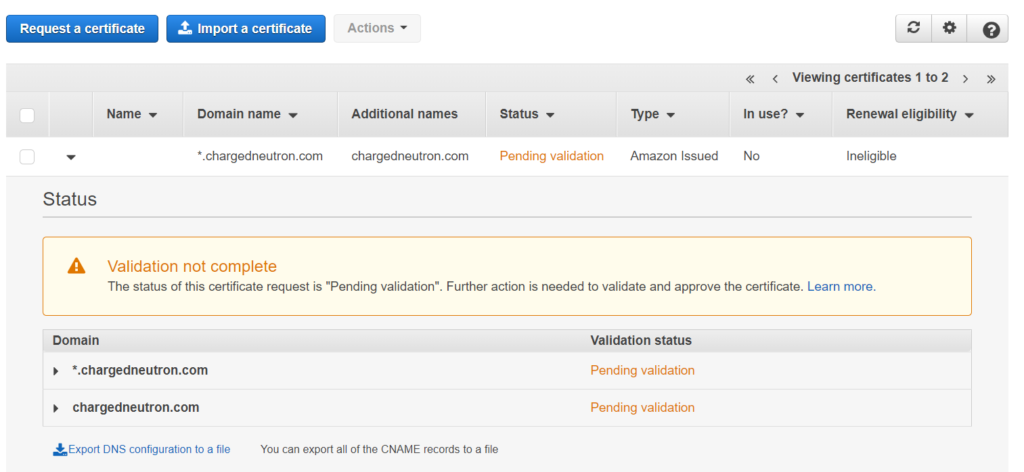
It will initially show Pending validation. Wait for a until the status becomes Issued.
Here is what a successfully validated SSL Certificate looks like.
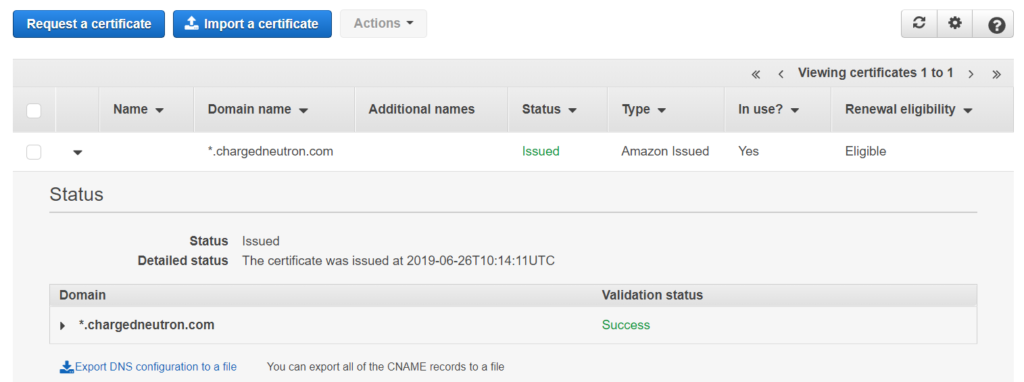
With that you can now use a Public SSL Certificate to use for your website visitors.
If you waited a long time and the certificate was still not issued there might be an issue with your Domain Name not pointing to Route 53 Name servers. Check my post on associating GoDaddy Domains to Route 53.
Let me know how your request for a Public Certificate went on AWS Certificate Manager on the comment box below.